Lesson 7: Support and Resistance Done Right
Beginner LevelPublished: September 17, 2025
Lesson 7: Support and Resistance Done Right
Learning outcomes: Mark high-quality zones, understand role reversal, and trade with clear structure.
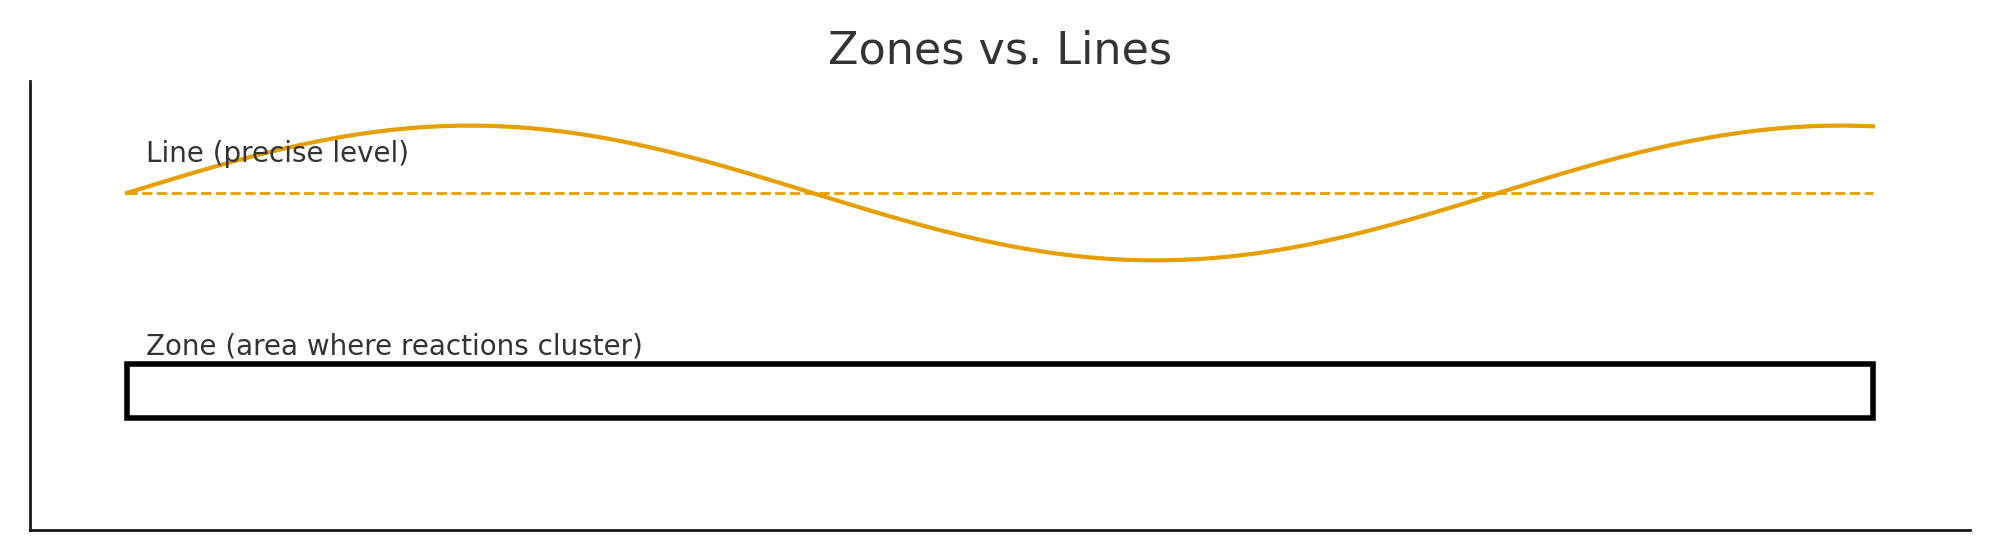
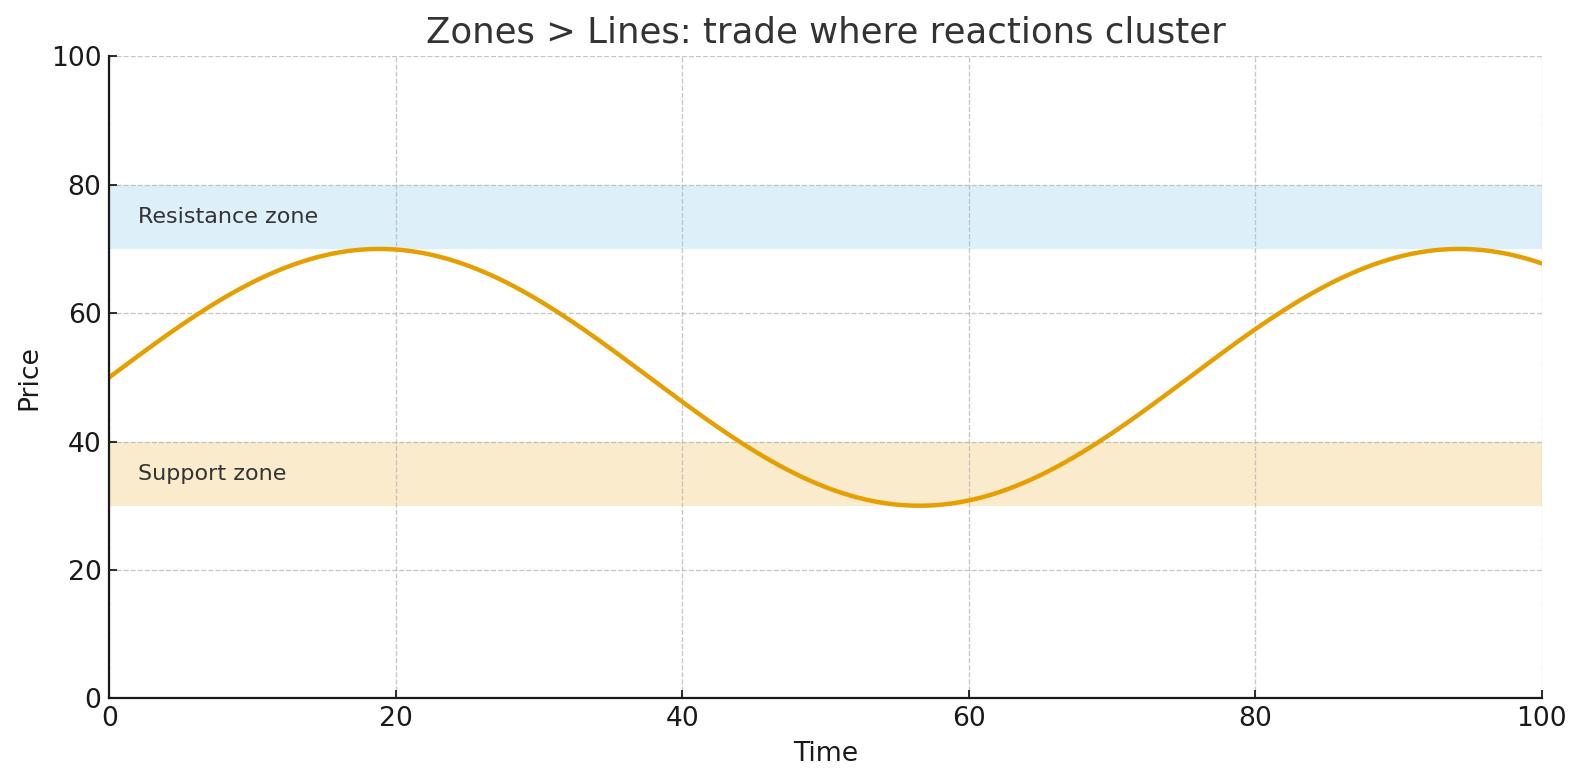
Support and resistance are zones, not perfect lines. Your job is to find the areas where price consistently reacted.
The best zones are fresh, clear, and aligned with higher timeframe bias.
Core concepts
- Zones capture order clusters better than lines.
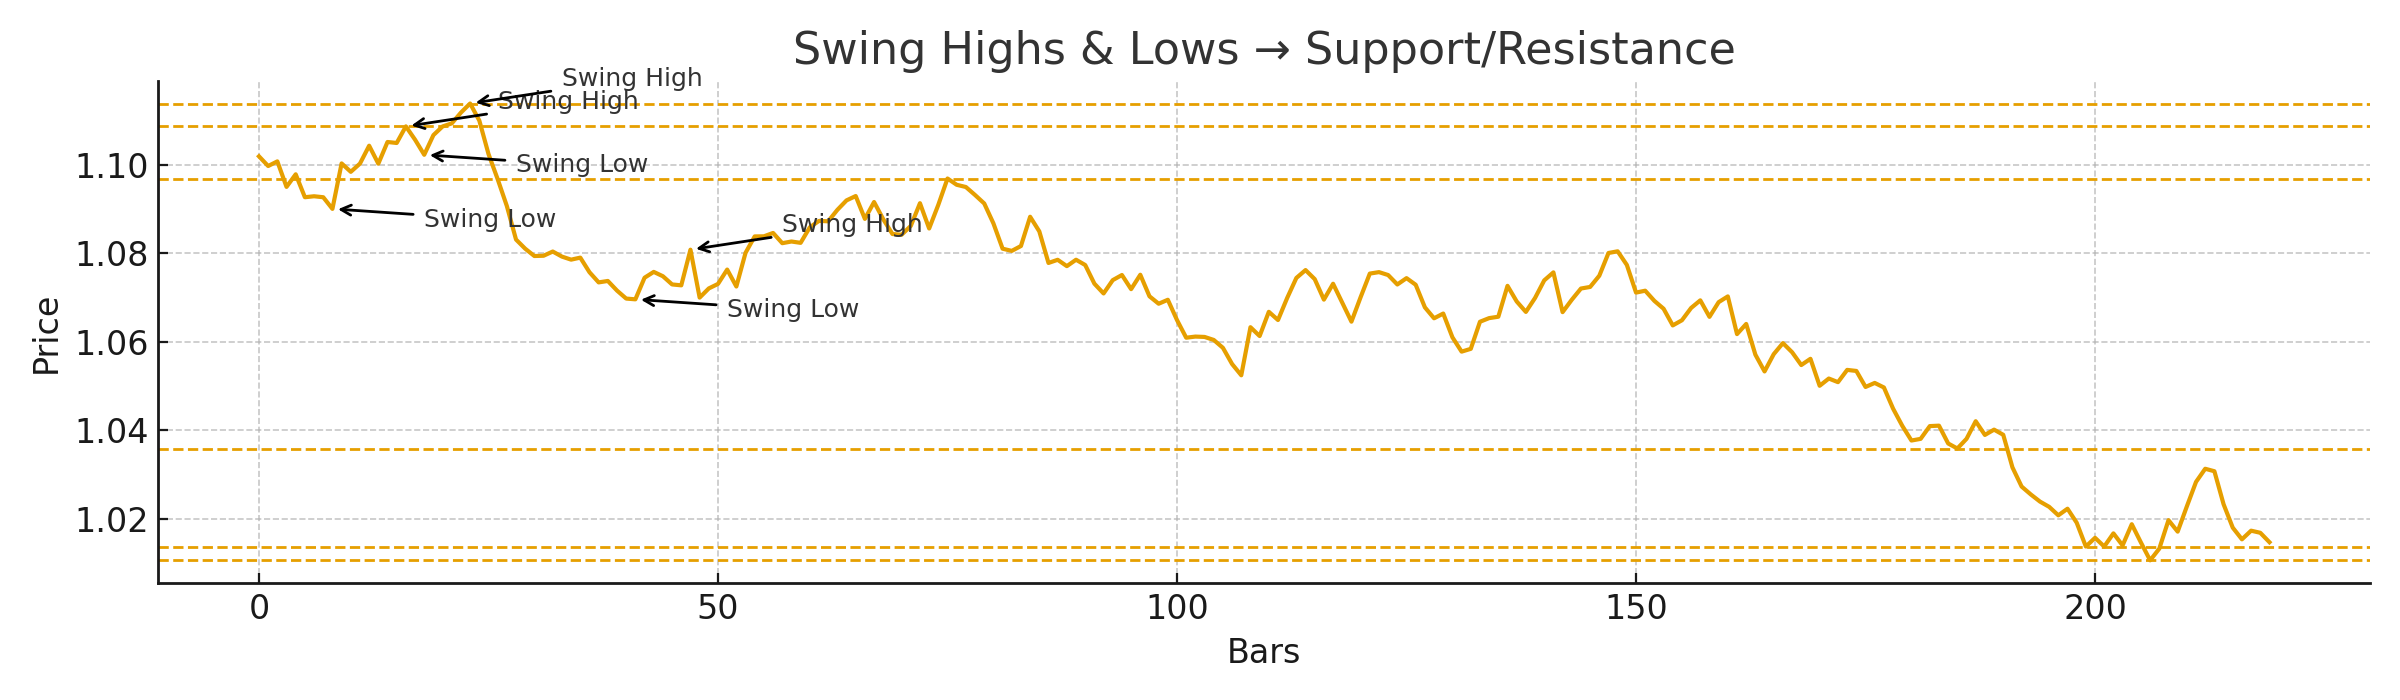
- Swing highs and lows define structure.
- Role reversal is a common retest behavior.
- Fresh zones have higher probability.
- Liquidity builds above and below obvious levels.
Execution framework
- Mark H1 or H4 zones first.
- Refine the zone edge on M15.
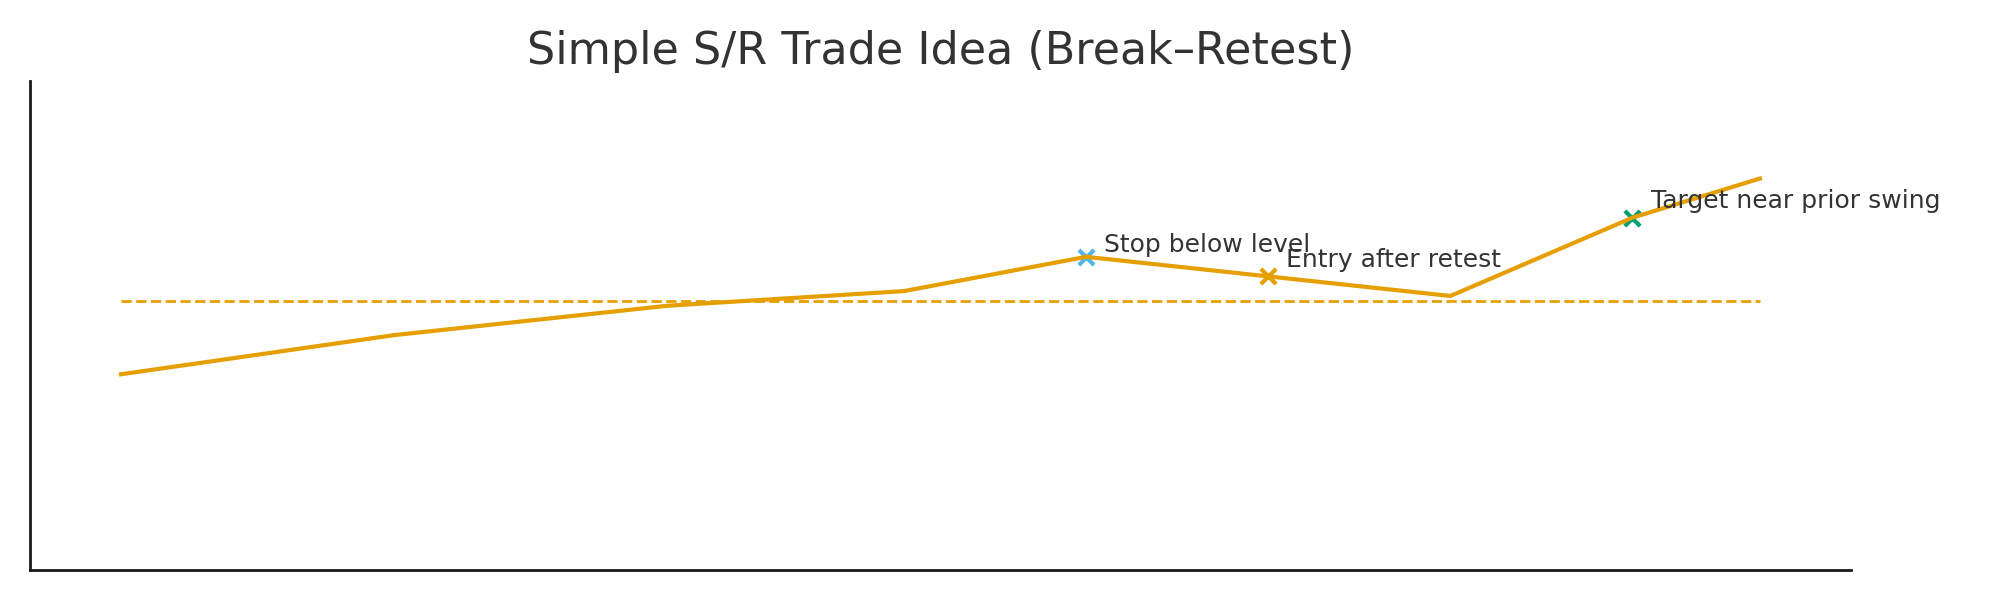
- Wait for rejection or break and retest.
- Enter only after confirmation.
- Target the next major zone.
Annotated walkthrough
Example: resistance flips to support after a breakout.
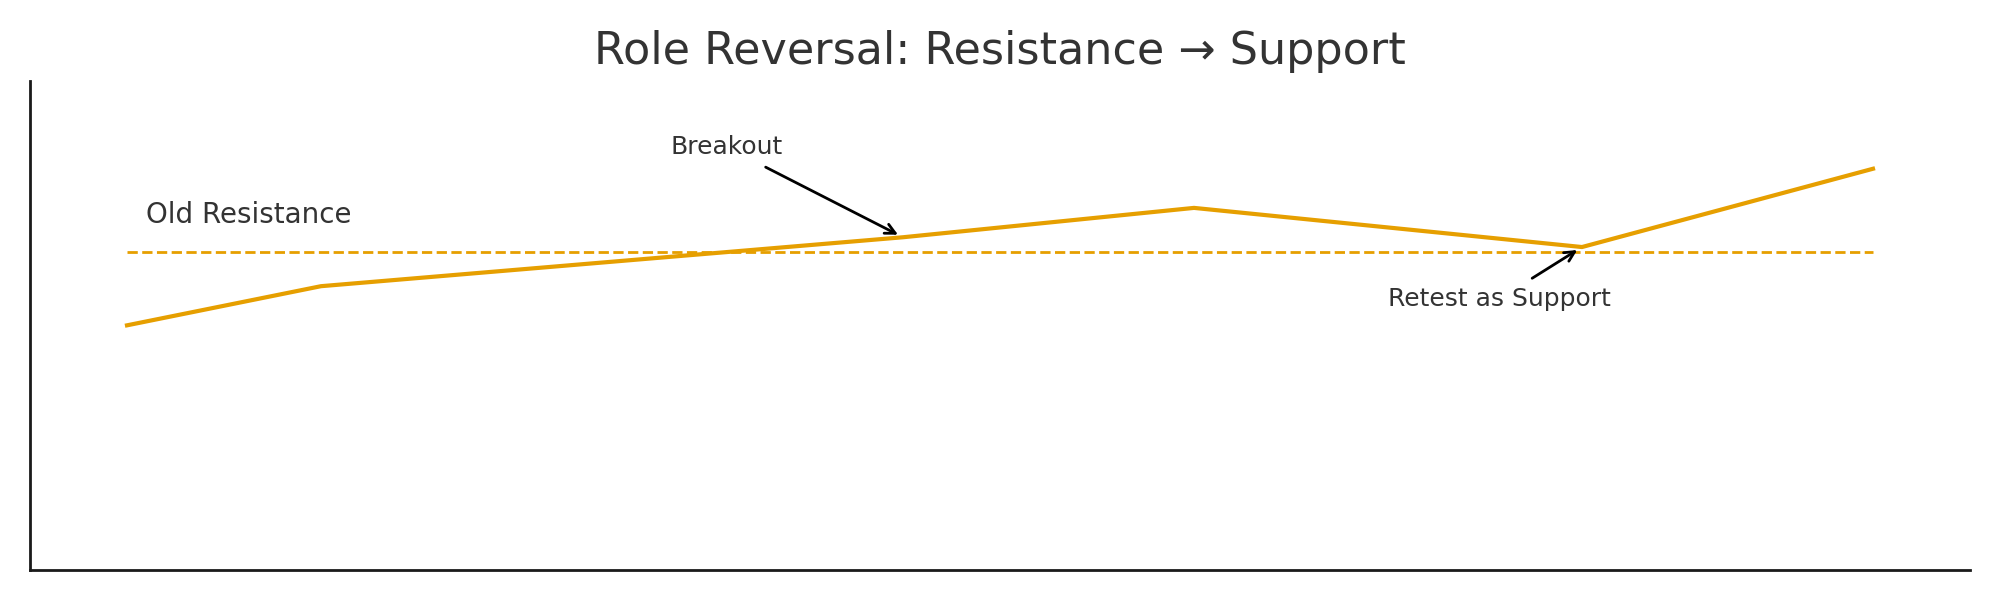
- Identify the breakout and mark the old resistance.
- Wait for price to retest and hold the zone.
- Enter after a rejection candle.
- Target the next swing high.
Common mistakes
- Drawing too many levels.
- Trading worn-out zones with many touches.
- Entering without confirmation.
- Ignoring the higher timeframe trend.
Checklist
- Zone is fresh and clear.
- HTF bias aligns with trade direction.
- Rejection or break/retest confirms.
- Stop placed beyond the zone.
Practice drills
- Mark three zones on each of three pairs.
- Track how price reacts to fresh versus old zones.
- Build a role-reversal watchlist.
Pro tips
- Less is more with levels.
- Fresh zones beat overused ones.
- Use zones with clear impulsive origin.
Annotated Chart Pack
5+ annotated examples for this topic.
Download the lesson pack for offline study and practice.
Lesson Quiz
Pass mark: 80%